
iPhone Stuck in Recovery Mode: Safe Exit Steps and Repair Decisions
If your iPhone is stuck on the recovery mode screen, a force restart is the safest first step; if that fails, connect the iPhone to a computer and choose Update before Restore. Update reinstalls iOS without intentionally erasing your data, while Restore erases the device completely. This guide walks you through each step, the data risk at each stage, and when the problem is hardware that needs professional assessment.
On this page
If your iPhone is stuck on the recovery mode screen, a force restart is the safest first step; if that fails, connect the iPhone to a computer and choose Update before Restore.
Who this guide helps
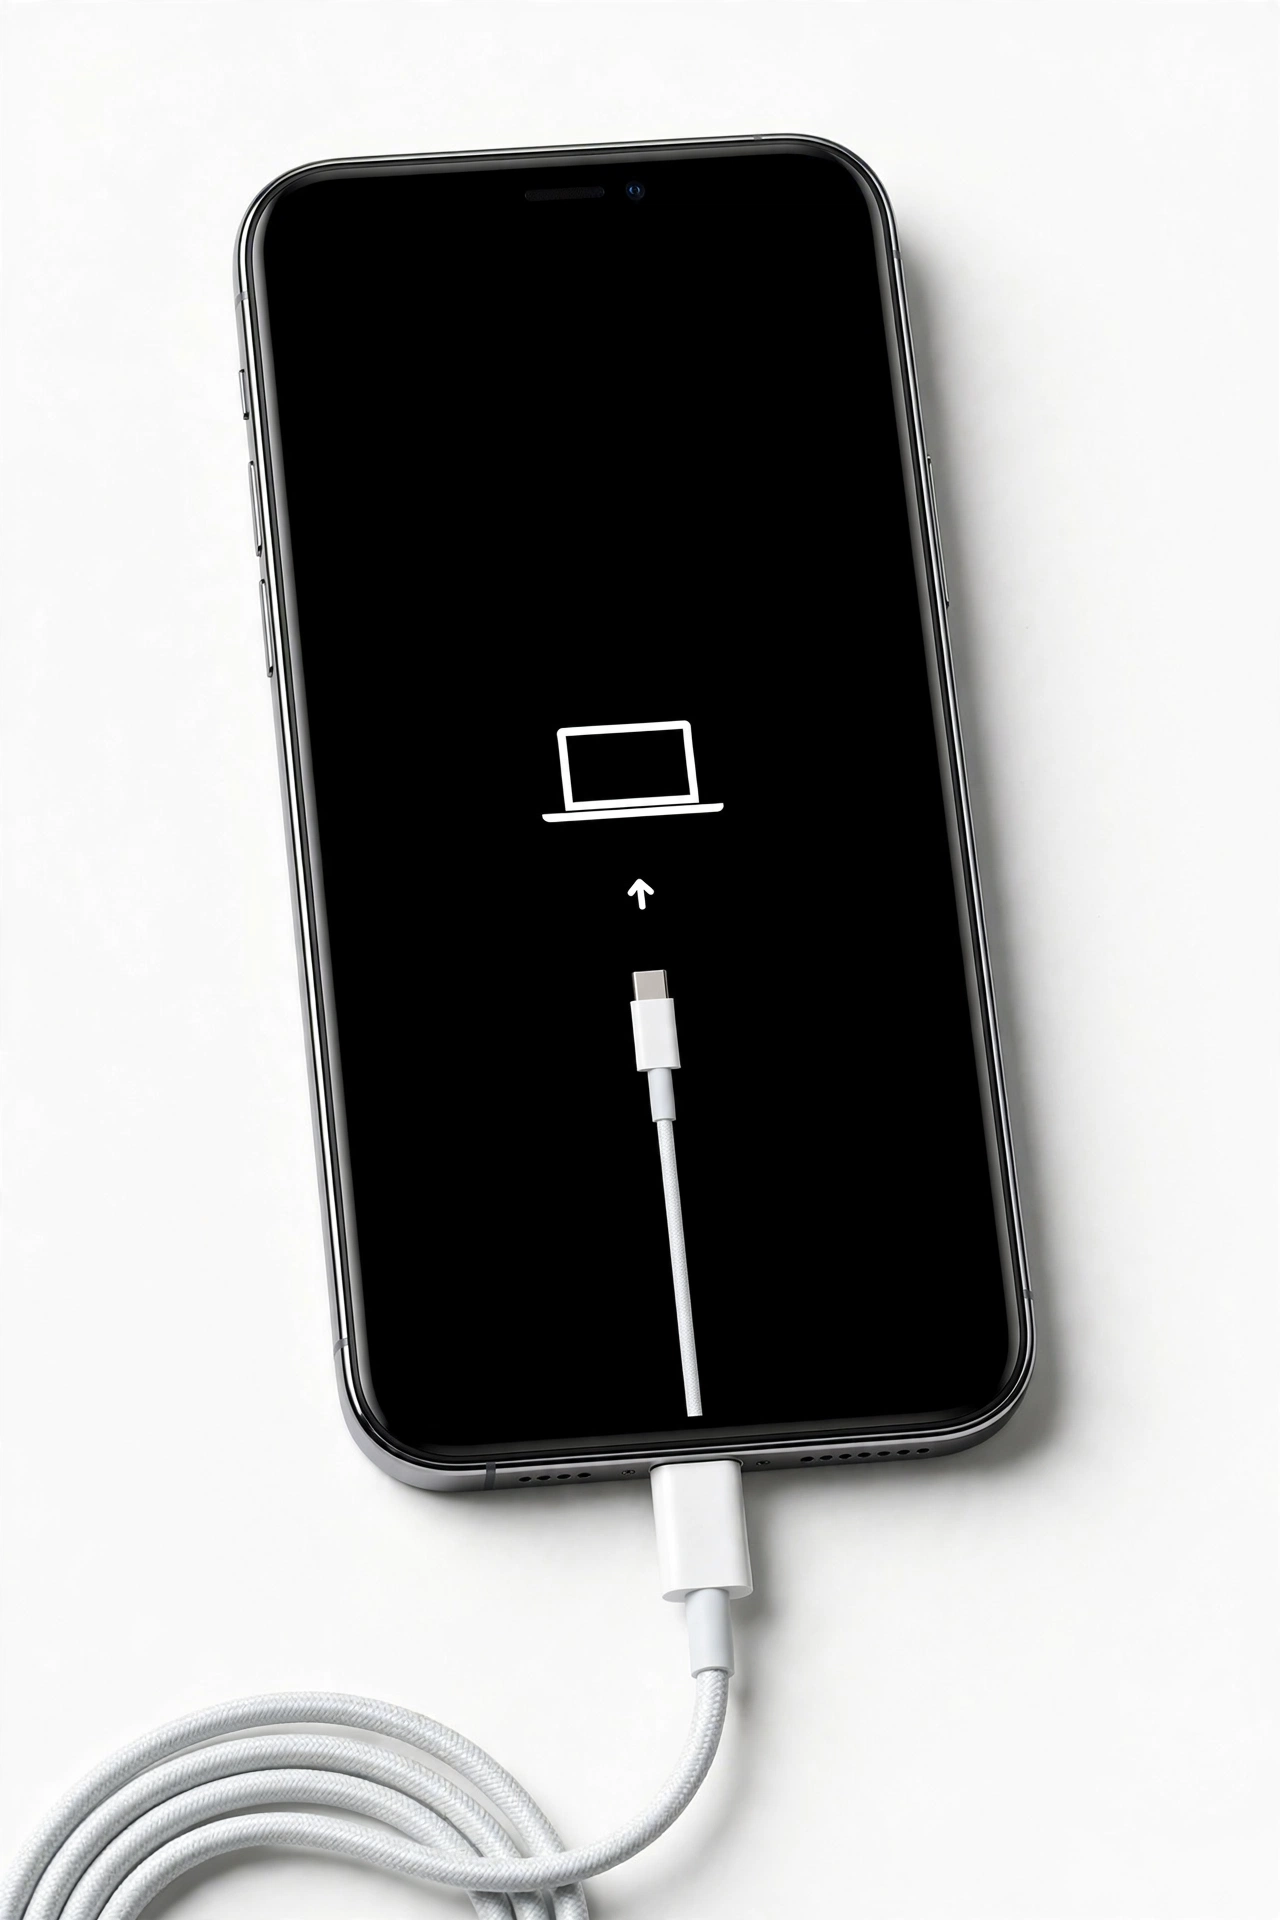
This guide is for anyone whose iPhone shows the recovery mode screen — a cable pointing at a computer icon (on newer iOS versions, an image of a computer and a cable) — and will not boot past it. It also helps if your iPhone entered recovery mode unexpectedly during an update or restore, if it returns to the recovery screen every time you restart it, or if your computer detects the iPhone but shows a prompt offering Update or Restore. The steps below apply to iPhone 8 and later (including iPhone X through iPhone 17 and iPhone SE 2nd and 3rd generation), iPhone 7 and 7 Plus, and older models with a Home button, with the model-specific button sequences noted where they differ. (Source: support.apple.com)
Quick facts: Recovery mode is a software rescue state, not a death sentence for your iPhone. Most stuck-in-recovery-mode cases are fixed with a force restart or an Update via a computer, neither of which is designed to erase your data. Restore, the heavier option, always erases.
What recovery mode is — and what it is not
Recovery mode is a special startup state built into every iPhone. When an iPhone cannot complete its normal boot sequence — for example, after an interrupted software update or a corrupted system file — it can drop into recovery mode, where it shows the cable-and-computer graphic and waits for instructions from a Mac or Windows PC. In this state, the iPhone will not start its home screen, apps, or cellular functions; it only communicates with a computer through Finder (on Mac) or the Apple Devices app or iTunes (on Windows).
Recovery mode is different from three things people often confuse it with:
- A boot loop: In a boot loop, the iPhone repeatedly restarts and shows the Apple logo over and over. A phone stuck in recovery mode stays on the cable-and-computer screen instead of restarting repeatedly. For the boot-loop case, see our guide to safe steps for an iPhone stuck in a boot loop.
- Frozen on the Apple logo: A phone stuck on the Apple logo never reaches any menu or the recovery graphic. Different checks apply — see iPhone stuck on the Apple logo.
- DFU (Device Firmware Update) mode: A deeper, screen-black rescue state that skips the bootloader. Apple positions DFU as a last resort and it erases the device; recovery mode is the step to try first, and Apple’s own guidance starts there.
Recovery mode is Apple-documented and reversible. It exists so that a Mac or PC can reinstall the operating system even when the iPhone cannot boot on its own.
How an iPhone ends up stuck here
Understanding how the phone reached recovery mode helps you pick the right fix. The common triggers are:
- An interrupted software update: The most common cause. If an iOS update is interrupted — by a drained battery, a disconnected cable, or a failed download — the system software can be left in an inconsistent state, and the phone boots to recovery mode instead of iOS.
- A failed or interrupted restore: If a restore from iTunes, Finder, or the Apple Devices app was interrupted, the phone may sit in recovery mode waiting for the process to be completed.
- A full or nearly full storage drive: Updates need working room. When storage is nearly full, an update can fail midway and strand the phone.
- A failing system file or app-level corruption: Less common, but a corrupted system component can trigger recovery mode on restart.
- A hardware problem: If the phone returns to recovery mode after every successful Update and Restore, or throws the same restore error repeatedly, a hardware fault (NAND storage, logic board, or a loose connector) may be the cause. That pattern means it is time to stop and seek professional assessment.
Before you do anything: answer the data question
The single most important thing to decide before you touch anything is whether you have a backup of the phone’s data. Recovery mode itself does not erase anything, but the heavier fix (Restore) does. Your position is one of three:
- You have a recent iCloud or computer backup: You have a full safety net. Even if Restore becomes necessary, you can bring your data back afterwards. Proceed through the steps confidently.
- You have an older backup, or you are not sure: Favor the non-destructive options (force restart, then Update). Avoid Restore until you have weighed what is on the phone against what is in the backup.
- You have no backup: Do not choose Restore as a first step. Try force restart, then Update. If both fail, pause and consider professional assessment — a repair shop may be able to attempt data recovery options before a destructive restore. For how to avoid this situation next time, see how to back up your iPhone before a repair.
Stop for safety: If the iPhone’s screen is lifting away from the frame, the back is bulging, or the phone is swollen, warm with a chemical odor, or hot to the touch, stop. Do not charge it, do not press the screen back down, and do not open the device. A swollen battery is a fire risk — set the phone aside on a non-flammable surface and seek professional assessment before continuing with any troubleshooting.
Step 1: Try a force restart (no computer needed)
A force restart is the quickest way to exit recovery mode, and it does not erase data. In many cases, the phone was not truly stuck — it simply needs a clean restart to continue booting. Use the sequence for your model:
- iPhone 8 or later (including iPhone X through iPhone 17 and iPhone SE 2nd/3rd generation): Quickly press and release the Volume Up button, quickly press and release the Volume Down button, then press and hold the Side button. Keep holding the Side button until you see the Apple logo, then release.
- iPhone 7 and iPhone 7 Plus: Press and hold the Side button and the Volume Down button together until the Apple logo appears.
- iPhone 6s, iPhone SE (1st generation), and earlier: Press and hold the Home button and the Top (or Side) button together until the Apple logo appears.
Give the phone a minute to boot. If it starts normally and reaches the Lock Screen, the problem is resolved — back up the phone right away (see our backup guide) so you are protected if it happens again. If the recovery mode screen reappears, move on to the computer-based steps below. If nothing happens at all — no Apple logo, no recovery screen — make sure the phone has charge (leave it on a known-good charger for at least 30 minutes) and try the sequence once more.
Step 2: Prepare the computer
Recovery mode fixes are done from a computer, not from the phone itself. Gather the following:
- A Mac or Windows PC with a reliable internet connection. The Update and Restore processes download iOS from Apple’s servers, so the connection matters.
- The right software: On a Mac running macOS Catalina or later, use Finder. On older Macs, use iTunes. On a Windows PC, use the Apple Devices app (or iTunes on older setups). Make sure the software is up to date before you begin.
- A good cable: Use an Apple USB cable or a certified equivalent, plugged directly into the computer’s USB port — not through a keyboard or USB hub. A flaky cable is one of the most common causes of recovery failures and error codes.
Open Finder (Mac) or the Apple Devices app / iTunes (Windows) before connecting the phone, and if the phone is not yet in recovery mode, you will enter it in the next step.
Step 3: Put the iPhone in recovery mode and connect
If the phone is already showing the cable-and-computer screen, simply connect it to the computer with the USB cable and look for the iPhone in the Finder sidebar or in the Apple Devices app / iTunes window. Select it when it appears.
If the phone is not showing the recovery screen (for example, it is stuck on the Apple logo or a black screen), enter recovery mode manually with the cable connected to the computer:
- iPhone 8 or later: Connect the cable to the computer, then connect it to the iPhone while quickly holding the Side button. Keep holding the Side button — do not release it when the Apple logo appears — until the recovery mode screen (cable and computer image) appears.
- iPhone 7 and 7 Plus: Connect the cable, then press and hold the Side button and the Volume Down button together until the recovery screen appears.
- iPhone 6s, SE (1st generation), and earlier: Connect the cable, then press and hold the Home button and the Top (or Side) button together until the recovery screen appears.
When the computer recognizes the phone in recovery mode, it will show a message that the iPhone needs to be updated or restored, with Update and Restore as the two choices. If the iPhone’s buttons do not respond and you cannot reach the recovery screen at all, Apple says the device may need service — stop here and seek professional assessment.
Step 4: Choose Update first — not Restore
This is the decision that protects your data. Apple’s guidance is explicit: try Update before Restore.
- Update reinstalls the current version of iOS over the existing system without intentionally erasing your personal data. It is the right first choice when you have no backup or want to preserve what is on the phone.
- Restore erases the iPhone completely — all content and settings — and installs a fresh copy of iOS. Only use it if Update fails or is unavailable, and only when you accept the data loss or have a backup to restore from afterwards.
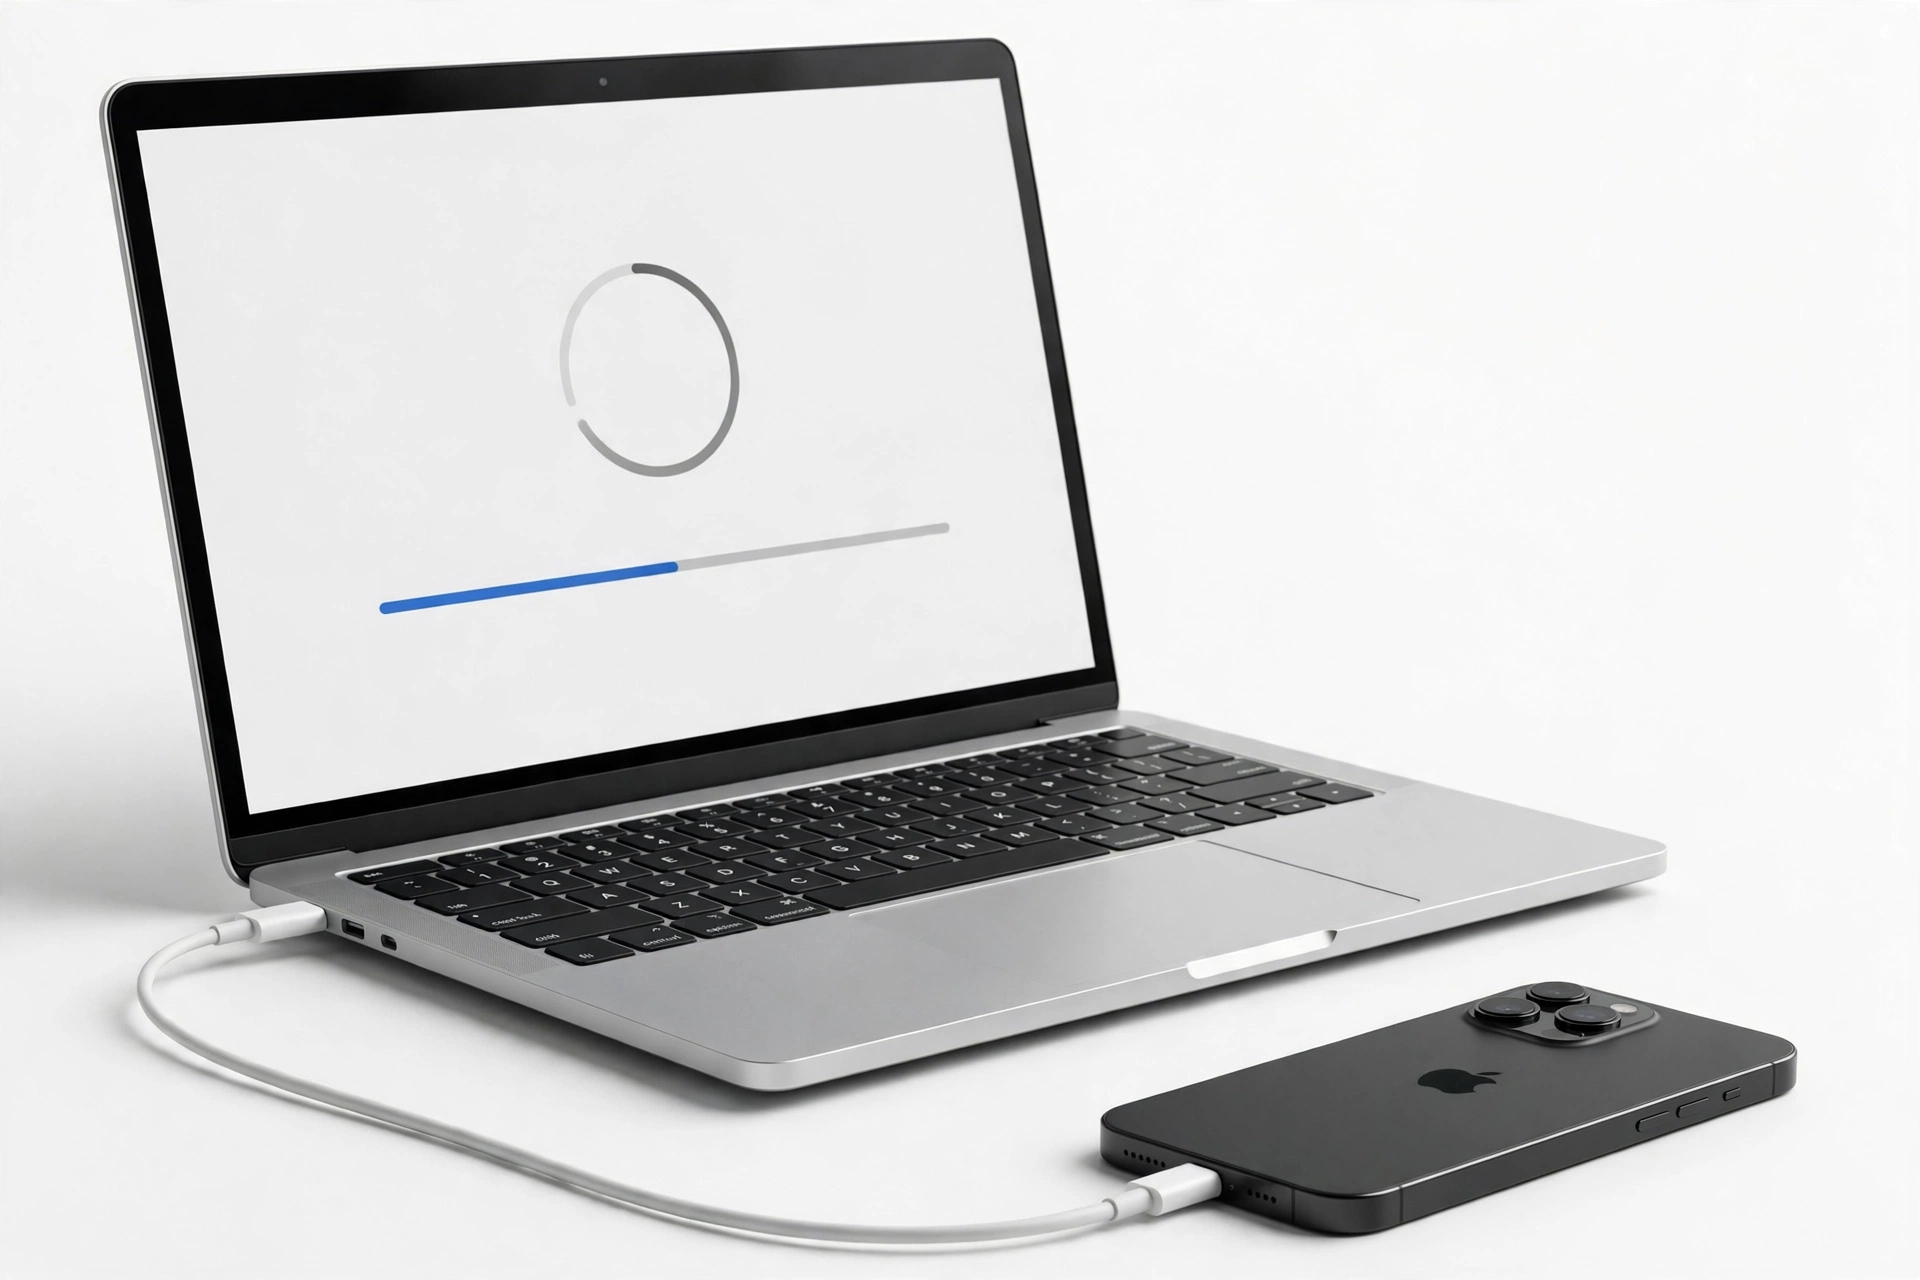
Click Update. The computer will download the iOS software and install it on the iPhone. Keep the phone connected and do not interrupt the process. If the download takes a long time, be aware of an important detail: if the download takes more than about 15 minutes, the iPhone may exit recovery mode on its own. That is normal — let the download finish on the computer, then repeat the button steps to put the phone back into recovery mode and run the Update again.
If Update completes and the phone restarts normally, set it up if prompted and verify your data is intact. Then back up immediately.
Step 5: If Update fails, consider Restore (erases everything)
If Update fails, times out repeatedly, or is not offered, Restore is the next option — but read the warning first.
Restore erases the iPhone. Choosing Restore deletes all content and settings and installs a fresh copy of iOS. Only confirm it if you have a backup you can restore from afterwards, or if you have accepted that the data on the phone will be lost. After the restore finishes, the Hello screen appears; you can then set the phone up as new or restore from an iCloud or computer backup.
To restore: with the iPhone in recovery mode and connected, select it in Finder or Apple Devices / iTunes and choose Restore. Keep the phone connected until the process completes — this can take up to an hour on a slow connection. When the Hello screen appears, disconnect the phone and walk through setup. If you have an iCloud backup, choose “Restore from iCloud Backup” during setup; if you have a computer backup, restore from it after connecting to the same computer.
If Restore fails with the same error repeatedly, or the phone immediately returns to recovery mode after a successful Restore, the problem is very likely hardware. Do not keep retrying indefinitely — move to the hardware section below.
Every action, its data risk, and when to use it
Use this table to pick the right step for your situation instead of jumping to the most destructive option.
| Action | Data risk | When to use it |
|---|---|---|
| Force restart (model-specific button sequence) | None — designed not to erase data | Always the first attempt when the phone shows the recovery screen |
| Update via computer (Finder / Apple Devices / iTunes) | Low — reinstalls iOS without intentionally erasing; data should be preserved | After force restart fails; the correct first computer step per Apple’s guidance |
| Restore via computer | High — erases all content and settings | Only after Update fails or is unavailable, and only with a backup or accepted data loss |
| Retry Update after the 15-minute exit | Low — same as Update | When the phone left recovery mode because the download took longer than about 15 minutes |
| Try a different cable, USB port, or computer | None | When Update or Restore fails with connection errors (9, 4005, 4013, 4014) or the phone is not detected |
| Professional assessment / Apple service | Varies — a shop may attempt non-destructive options first | When buttons are broken, the phone cannot enter recovery mode, errors repeat, or Restore succeeds but the phone returns to recovery mode |
Common errors during Update or Restore — and what they mean
If the computer shows an error code while updating or restoring, the code points at the failure. Apple’s support pages group the common ones:
- Errors 9, 4005, 4013, 4014: Usually a connection problem between the iPhone and the computer. Try a different Apple USB cable, a different USB port (directly on the computer, not a hub), and a different computer if one is available. Make sure the computer’s software is up to date.
- Error 14: Often related to the USB connection or to security software on the computer interfering with the restore. Try the cable and port steps above, and temporarily disable third-party security software.
- Errors 17, 1639, 3000–3020, 3194, 3100–3999: Network connectivity errors — the computer cannot reach Apple’s software update servers. Check the internet connection, make sure firewalls allow Apple’s servers, and try a different network.
- “This device isn’t eligible for the requested build”: The computer is trying to install software that Apple no longer signs. Use the latest available iOS rather than an older firmware file.
A single transient error that clears after changing the cable or port is not a crisis. The same error repeating across multiple cables, ports, and computers is a different story — that pattern suggests a deeper software or hardware problem, and repeated blind retries waste time. Stop and get the phone assessed.
When it is a hardware problem
Recovery mode is a software rescue path. When software rescue keeps failing, the underlying cause is often hardware. Seek professional assessment — rather than repeating restores — if any of these are true:
- The iPhone returns to the recovery mode screen after every successful Update and Restore.
- Update and Restore fail with the same error code on different cables, USB ports, and computers.
- The iPhone cannot enter recovery mode because a required button (Side, Volume, or Home) is broken or stuck.
- The phone shows signs of physical damage, prior water exposure, or a swollen battery.
- The computer does not detect the iPhone at all, even in recovery mode, across multiple setups.
A repair shop can run diagnostics the home steps cannot — checking the charging port, the button assemblies, storage health, and logic-board behavior. Frame the visit as an assessment: the goal is a confirmed diagnosis and a clear quote before any work is approved. If you have no backup and the data matters, say so up front — some shops can attempt data recovery approaches before a destructive restore.
Hypothetical example: Maya’s iPhone 12 showed the recovery screen after an update that was interrupted when her battery died at 2%. She connected it to her MacBook, chose Update in Finder, and the phone restarted normally with all her photos intact — no Restore needed. The Update path exists precisely for situations like this.
Hypothetical example: Daniel’s iPhone 11 kept returning to recovery mode after three successful Restores on two different computers. Rather than trying a fourth time, he had it assessed — a failing storage component was confirmed, and he approved a hardware repair with a clear quote instead of another blind restore.
Preventing the next recovery-mode scare
Once the phone is working again, a few habits make a repeat far less likely:
- Keep a current backup. iCloud Backup or a regular computer backup means Update-vs-Restore is a convenience question, not a data emergency. See how to back up your iPhone before a repair for the full routine.
- Update on a full charge with a stable connection. Most recovery-mode incidents start as interrupted updates. Update over reliable Wi-Fi with the battery above 50% or the phone plugged in.
- Keep free storage. Leave several gigabytes free so updates have working room; iOS will warn you when storage is critically low.
- Use a good cable for computer updates. If you update or restore through a computer, use a certified cable plugged directly into the machine.
Video: How to tell if your smartphone is fake or real
Frequently asked questions
Need a hand in Las Vegas? If your iPhone keeps returning to recovery mode or the computer steps are not working, an in-person assessment can confirm whether the cause is software or hardware. Las Vegas Phone Repair & Accessories, 7400 Las Vegas Blvd S, Unit TT42, Las Vegas, NV 89123 — (424) 406-6202. Hours are 10:00 AM–8:00 PM; call ahead to confirm today’s hours.
Will I lose my data if my iPhone is stuck in recovery mode?
Recovery mode itself does not erase anything — the data on the phone is still there while the cable-and-computer screen is showing. Whether you keep it depends on the fix: a force restart and an Update are designed to preserve your data, while a Restore erases the phone. That is why Update is always the first computer step.
How do I exit recovery mode without a computer?
Try a force restart using the button sequence for your model (Volume Up, Volume Down, then hold Side on iPhone 8 and later). If the phone boots normally, no computer is needed. If it returns to the recovery screen, a computer is required for the Update/Restore steps.
How long does the Update take in recovery mode?
It depends on the download size and your internet speed — typically from 15 minutes to an hour. Keep the iPhone connected the entire time. If the download takes longer than about 15 minutes, the phone may exit recovery mode by itself; let the download finish, then re-enter recovery mode and run the Update again.
Update failed — should I keep retrying or go straight to Restore?
Retry Update once or twice with the basics checked (different cable, different USB port, updated computer software, stable internet). If it keeps failing, Restore is the next step — but only after you have reckoned with the data loss, since Restore erases the phone. If you have no backup and the data matters, consider professional assessment before restoring.
What does error 4013 mean during a restore?
Error 4013 (along with 9, 4005, and 4014) usually indicates a communication problem between the iPhone and the computer — most often the cable, USB port, or computer software. Switch to a known-good Apple cable plugged directly into the computer, update Finder/Apple Devices/iTunes, and try another computer if possible.
Can I use recovery mode if my iPhone’s buttons are broken?
Probably not reliably — entering recovery mode requires holding specific buttons, and Apple notes that if the buttons do not respond and the recovery screen cannot be reached, the device may need service. A repair shop can address the button fault first.
Is recovery mode the same as a factory reset?
No. Recovery mode is a rescue state; nothing is erased just by entering it. A factory reset (Erase All Content and Settings, or a Restore from recovery mode) is the action that erases. Think of recovery mode as the doorway and Restore as the destructive step you take through it.
When should I stop troubleshooting and get the phone assessed?
Stop when the phone returns to recovery mode after successful Updates and Restores, when the same error repeats across different cables and computers, when buttons needed for recovery mode do not work, or when there are signs of damage, water exposure, or battery swelling. Continued blind retries at that point risk wasting time and, in the swelling-battery case, are unsafe.
Sources and editorial notes
- Apple Support — Use a computer to reset your iPhone and your passcode (HT204306): Apple’s documented recovery-mode entry sequences by model (Side button for iPhone 8 and later, Side + Volume Down for iPhone 7/7 Plus, Home + Top/Side for earlier models), the computer-and-cable screen, and guidance that a device whose buttons do not respond may need service.
- Apple Support — If you see an error when you update or restore your iPhone, iPad, or iPod: Apple’s grouping of common restore error codes (9/4005/4013/4014 as connection issues; 17/1639/3000–3020/3194 as network issues), with cable, port, and computer-swap remedies.
- Techsith — How to put an iPhone in recovery mode (model-specific steps): Independent corroboration of Apple’s recovery-mode button sequences across iPhone 8 and later, iPhone 7/7 Plus, and Home-button models, plus the Update-before-Restore order and the roughly 15-minute recovery-mode exit during long downloads.
- iGeeksBlog — iPhone update troubleshooting: Corroborates the Finder (Mac) / Apple Devices app (Windows) workflow and the guidance to try Update in recovery mode before Restore.
Last source check: October 13, 2026. AI-assisted editorial guide, checked against the linked manufacturer information. Recovery-mode button sequences and the Update-before-Restore order follow Apple’s published support guidance; third-party sources are used only to corroborate procedure details, not to replace Apple’s documentation. If Apple’s guidance changes, the manufacturer page takes precedence.
Let’s get you connected again.
Tell us what’s happening with your device and we’ll help you decide the safest next step — no jargon, no pressure.
Las Vegas Phone Repair & Accessories · 7400 Las Vegas Blvd S, Unit TT42, Las Vegas, NV 89123
10:00 AM–8:00 PM — call ahead to confirm today’s hours