
Motorola Camera Not Focusing: Causes and Safe Fixes
If your Motorola camera won’t focus, the cause is usually a dirty lens, a case blocking the focus sensor, or a stuck autofocus motor — and most cases are fixable in under ten minutes without opening the phone. This guide walks through Motorola-specific checks in the right order, from the 60-second fixes to the safe-mode test, and explains exactly when blurry photos mean the camera needs professional repair.
On this page
If your Motorola camera won’t focus, the cause is usually a dirty lens, a case blocking the focus sensor, or a stuck autofocus motor — and most cases are fixable in under ten minutes without opening the phone.
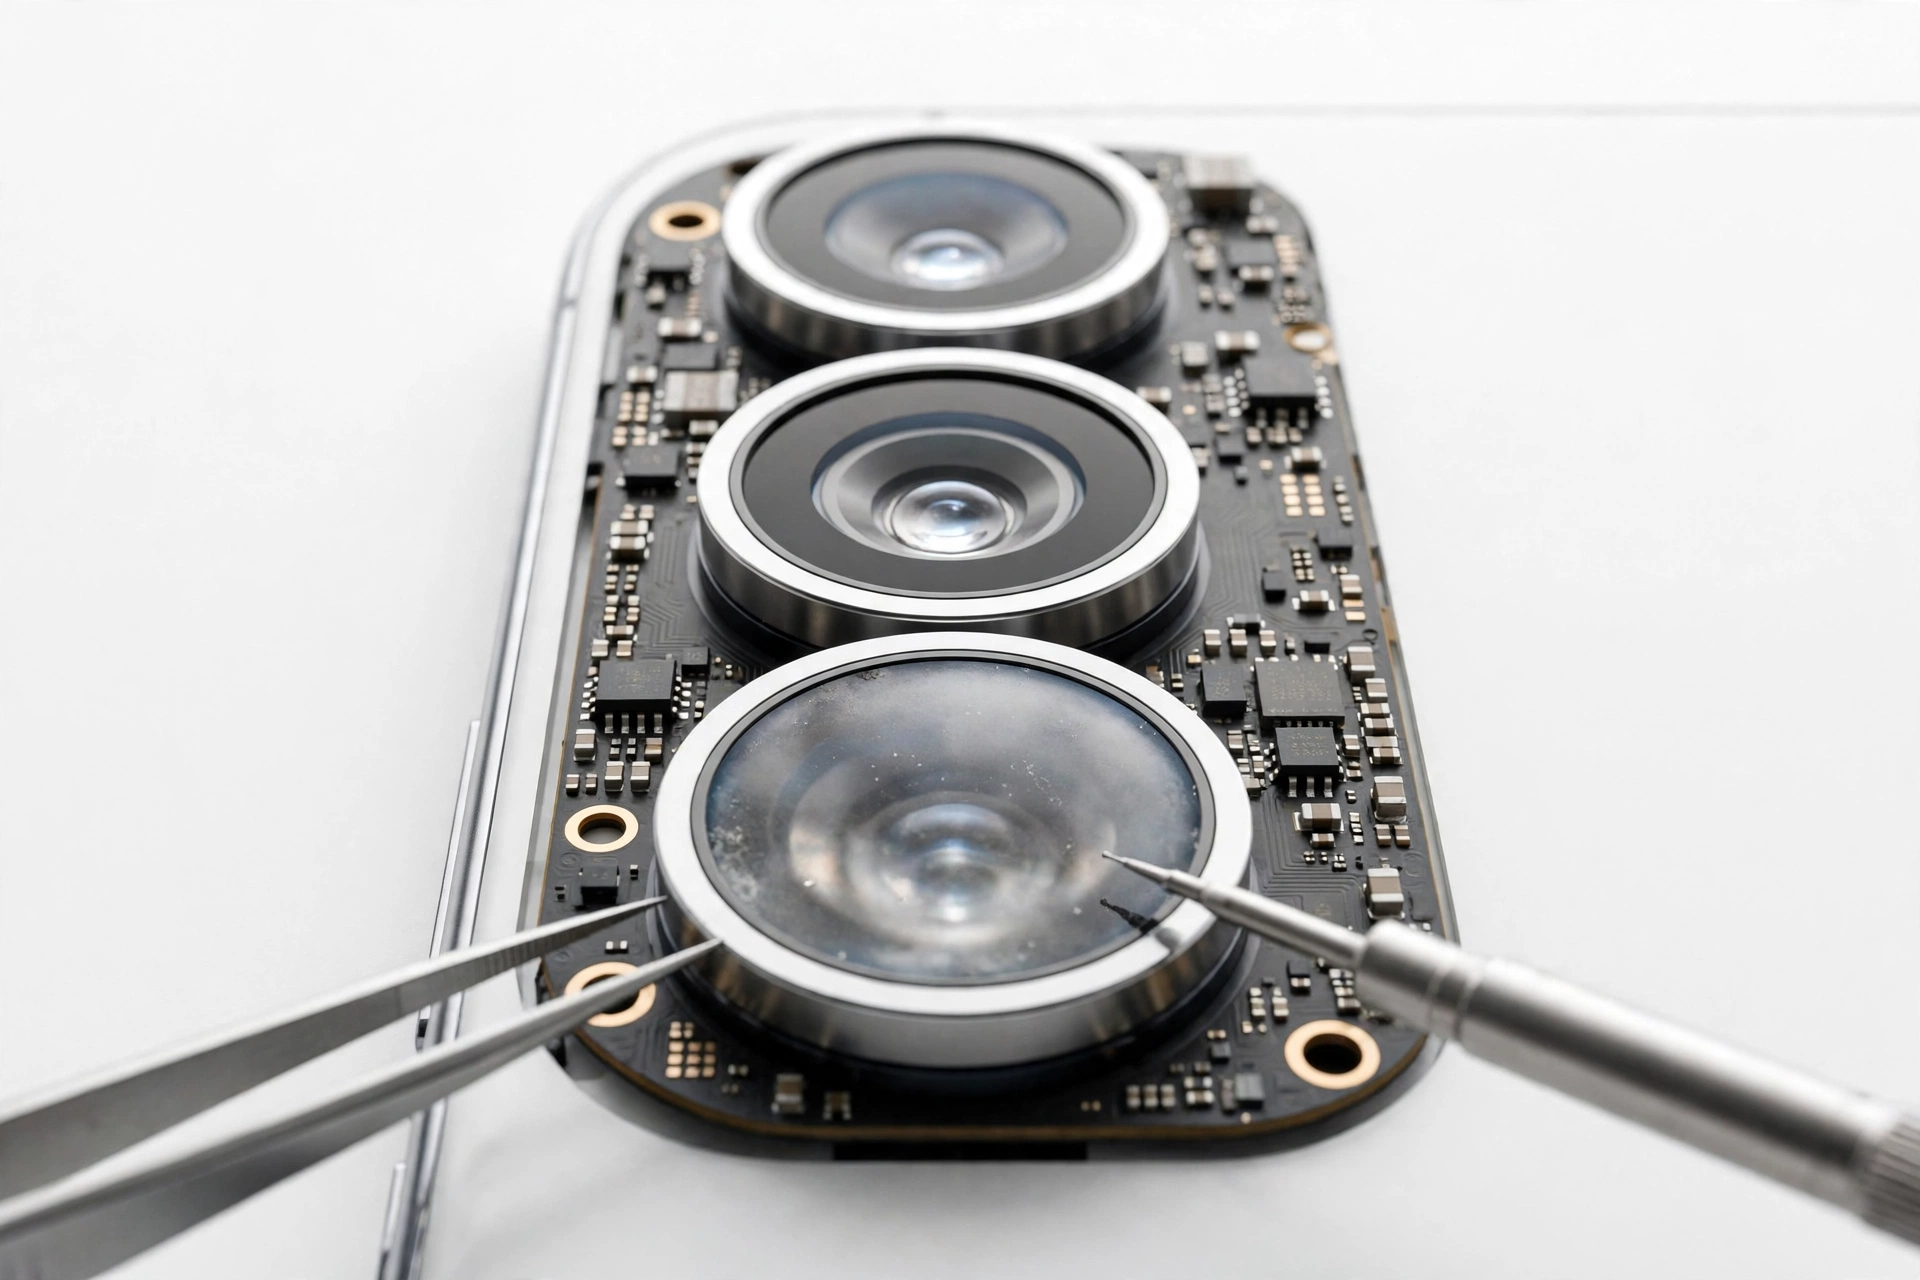
1. The short answer: why your Motorola camera won’t focus
A Motorola phone that takes blurry photos or hunts for focus without ever locking on is dealing with one of four things: something blocking the lens or focus sensor, a software glitch in the Moto Camera app, a camera setting working against you, or a mechanical failure inside the camera module. The order matters — you always rule out the easy, reversible causes before suspecting hardware, because the easy causes account for the large majority of focus complaints. (Source: en-in.support.motorola.com)
This guide is written for owners of Motorola’s current lineup — the Moto G series (including Moto G Power, Moto G Stylus, and Moto G Play), the Moto Edge series, and the Motorola Razr foldables — running Motorola’s near-stock Android with the Moto Camera app. The steps also apply to older Moto E, Moto X, and Moto Z models, with small menu differences noted where they matter.
Quick fact: Motorola’s own support pages list the same first step for every blurry-photo complaint across its models: wipe the lens clean with a soft, dry cloth and retake the photo. It sounds almost too simple, but a fingerprint-smudged lens is the single most common reason a phone camera can’t find focus.
2. Start here: the 5-minute fix sequence
Do these in order. After each step, open the camera and test focus on a well-lit subject about a meter away. Stop as soon as focus works — there’s no need to complete the list.
Step 1 — Clean the lens (60 seconds)
Wipe the rear camera lenses with a clean, soft, dry microfiber cloth using gentle circular motions. Phone lenses collect pocket lint, skin oil, and a thin film of grime that scatters light and confuses the autofocus system. If you wear glasses, the cloth that came with them is ideal. Do not use your shirt — fabric can trap grit that scratches the lens coating.
Step 2 — Take the case off (30 seconds)
Remove any case, bumper, or stick-on camera-lens protector, then test again. This single step resolves a surprising number of Motorola focus complaints, particularly on Edge models, for a reason explained in section 6: the laser autofocus sensor sits beside the lenses, and anything covering or diffusing it breaks distance measurement.
Step 3 — Tap to focus (30 seconds)
Open the Moto Camera app, point at your subject, and tap directly on it on the screen. You should see a focus bracket or circle appear and the image snap sharp. If tapping works but automatic focus doesn’t, the issue is with the auto-focus behavior or settings, not the hardware — skip ahead to section 9.
Step 4 — Restart the phone (2 minutes)
Press and hold the power button, tap Restart (or Power off, wait 10 seconds, then power back on). A restart clears the camera sensor’s state and kills any app holding the camera hardware in a bad state. Motorola’s support documentation lists this as the first troubleshooting step for camera errors on every model.
Step 5 — Test in good light on a normal subject (1 minute)
Autofocus systems need contrast and light to work. Test on a textured, well-lit subject — a book cover, a plant, a face — not a blank wall, a clear sky, or a dark room. If focus works in good light but fails in the dark, that’s expected behavior (see section 9 on Night Vision), not a fault.
Tip: Work through the sequence exactly once, methodically. Randomly repeating steps or changing three settings at once makes it impossible to know what actually fixed the problem — and if the problem returns, you won’t know which step to repeat.
3. How autofocus works on Motorola phones
Understanding which focus system your Motorola uses helps you interpret symptoms. Motorola has shipped three different autofocus technologies across its lineup:
- Fixed focus (no autofocus): Some entry-level models — most famously the original Moto E — shipped without autofocus hardware at all. Everything beyond a certain distance is acceptably sharp, but close-up text and near subjects will always look soft. If your budget Motorola has never focused up close, that may be the design, not a defect. Check your model’s specifications before troubleshooting further.
- Contrast-detection autofocus: Common on Moto G and Moto E models. The camera sweeps the lens back and forth, analyzing the image for maximum contrast. It’s accurate but relatively slow, and it struggles in low light and on low-contrast subjects (blank walls, clear skies). Focus “hunting” — the lens visibly pulsing in and out — is characteristic of this system working hard, not necessarily failing.
- Phase-detection autofocus (PDAF): Found on mid-range and upper Moto G models and the Edge series. Dedicated pixels on the sensor measure whether light rays converge in front of or behind the sensor, so the lens moves directly to the right position. Faster and better in low light than contrast detection.
- Laser autofocus: Motorola’s Edge flagships (including the Edge+ series) add a laser emitter and sensor beside the camera lenses. The laser measures distance to the subject directly, which dramatically speeds up focusing, especially in the dark. This is the system most vulnerable to case interference — cover the small laser window and distance measurement fails.
The front (selfie) camera on most Motorola phones uses a fixed-focus lens with a designed “sweet spot” roughly at arm’s length. If your selfies are soft when the phone is held very close or mounted far away, that’s the fixed focal distance, not a malfunction. Hold the phone at a normal selfie distance and test again.
4. Tap to focus and focus lock, done right
The Moto Camera app’s tap-to-focus is more capable than most people realize, and using it correctly eliminates a whole category of “won’t focus” complaints.
Basic tap to focus
With the rear camera open, tap the subject on the viewfinder. A bracket or circle appears where you tapped, the lens adjusts, and the exposure is also metered from that point. Take the shot promptly — on most Motorola phones, the manual focus point resets to center after a few seconds or after you take the photo.
Focus and exposure lock (AE/AF lock)
Touch and hold on your subject for about a second. The bracket should change appearance or a small lock icon should appear, indicating that both focus and exposure are now locked to that distance and brightness. You can then recompose the shot — move the phone to frame the scene differently — and the focus stays where you locked it. This is the single most useful technique for tricky subjects: focus on something at the same distance as your real subject, lock it, then recompose.
What the focus indicator tells you
- Bracket turns a solid color / stops pulsing: focus locked successfully.
- Bracket keeps pulsing or the image breathes in and out: the camera can’t find enough contrast — add light, pick a more textured target, or move slightly closer.
- Nothing happens when you tap: the app may have lost camera control — force-stop the camera app (Settings > Apps > Camera > Force stop) and reopen it, or restart the phone.
Tip: If tap-to-focus works perfectly but automatic focusing doesn’t, the lens hardware is fine. Your problem is in the auto-focus logic or a conflicting setting — jump to section 9 rather than suspecting a broken camera.
5. Clean the lens and sensors safely
Motorola’s support guidance is explicit: wipe the lens clean with a soft, dry cloth. Here’s how to do it thoroughly without risking damage.
What to clean
On the back of the phone, clean every glass circle in the camera array — not just the main lens. The ultrawide, telephoto, and macro lenses each have their own glass, and the laser autofocus window (on Edge models, a small dark dot or pill beside the lenses) must be spotless for distance measurement to work. On the front, clean the selfie camera, which on many Motorola phones sits in a hole-punch cutout at the top of the display and collects a surprising amount of skin oil from calls.
How to clean
- Use a clean microfiber cloth, dry. Fold it to a fresh section for each lens.
- Wipe in gentle circles, light pressure. Let the cloth do the work.
- For stubborn smudges, breathe lightly on the lens first — the faint condensation gives the cloth something to lift. Then buff dry.
- Check your work by holding the phone under a lamp and looking at reflections in the glass. Smudges show up as hazy patches.
What never to use
- No liquids dripped or sprayed onto the phone — moisture can seep past the lens seals into the camera module.
- No tissues, paper towels, or shirt fabric — wood fibers and trapped grit cause micro-scratches in the lens coating that permanently soften images.
- No compressed air — the force can drive dust deeper under the lens assembly or damage the autofocus mechanism.
- No needles, pins, or sharp objects anywhere near the lenses or microphone holes.
- No “water drop” tricks — old forum posts suggest placing a water drop on the lens as a macro lens. Liquid on or near the camera is never worth the risk to the phone’s seals and electronics.
Stop for safety: Never open the phone to clean “behind” the lens or to reach the camera module. The camera assembly is sealed and static-sensitive; opening the phone voids water resistance, risks battery damage, and can injure you. Interior moisture or dust is a repair-shop job, not a DIY cleaning task.
6. Cases, covers, and lens protectors that break focus
This is the Motorola-specific gotcha, and it’s worth its own section because it causes more Edge-series focus failures than any other single factor.
The laser autofocus window
Motorola’s Edge flagships measure subject distance with a laser autofocus system: an emitter beside the camera lenses fires an invisible beam and a sensor times its return. For this to work, the small laser window must have a completely clear line of sight. A case with a camera cutout that’s slightly misaligned, a stick-on “camera lens protector” that covers the whole array including the laser window, or even a thick case whose raised lip shadows the sensor at an angle can break distance measurement. The symptom is distinctive: the camera hunts for focus continuously, especially in low light where the laser matters most, but works acceptably in bright daylight (when PDAF/contrast can take over).
What to check
- Remove the case entirely and test focus. If focus returns, the case is the problem — not the phone.
- Look at the case’s camera cutout with the case off the phone. Every lens and the small sensor window beside them must be fully exposed, with margin to spare.
- Remove stick-on lens protectors and test. Many are marketed as universal but cover sensors they shouldn’t.
- Be wary of magnetic cases and mounts: the magnets don’t affect focus directly, but some magnetic mounts physically intrude into the camera area, and a strong magnet near the optical image stabilization (OIS) voice-coil motor can disturb its movement on some designs.
- Check for a misaligned aftermarket back cover or a swollen battery pushing the camera assembly out of alignment — both are hardware issues that need professional assessment.
Choosing a replacement case
If your case was the culprit, replace it with one that has a generous, precisely cut camera opening — ideally one designed specifically for your exact Motorola model, not a “universal” fit. Test focus with the new case on before keeping it.
7. Software fixes that actually work
When cleaning and de-casing don’t help, the next layer is software. Motorola phones run near-stock Android, so these paths are consistent across the Moto G, Edge, and Razr lines.
Restart the phone
Motorola lists this first for camera errors on every model: turn the phone off and back on. It resets the camera hardware state and clears any app holding the camera in a bad state. Don’t skip it just because it sounds basic.
Clear the camera app’s cache
A corrupted cache in the Moto Camera app can cause focus failures, viewfinder stutter, or crashes. Clearing it is safe — it removes temporary files only, not your photos.
- Open Settings > Apps (on some models: Settings > Apps > See all apps).
- Find and tap Camera (it may appear as “Moto Camera” or “Camera”).
- Tap Storage & cache.
- Tap Clear cache, then reopen the camera and test.
If problems persist, return to the same screen and tap Clear storage (sometimes labeled “Clear data”). This resets the camera app’s settings to defaults. Motorola’s support notes there is no undo for this, but your photos are stored separately in the Gallery/Photos app and are not affected.
Update the Moto Camera app
- Open the Play Store.
- Tap your profile icon > Manage apps & device.
- Look for Moto Camera (or Camera) under available updates and install it.
Install system updates
Go to Settings > System > System update and install anything pending. Camera focus behavior is partly controlled by system-level camera drivers, and Motorola ships focus and stability fixes in security and OS updates.
Check camera permissions
An app fighting over camera access can leave the camera in a broken state. Go to Settings > Apps > Camera and confirm permissions look normal, and review which other apps hold camera permission under Settings > Privacy > Permission manager > Camera — revoke access from apps you don’t recognize or no longer use.
Tip: After any software fix, test focus the same way every time: rear camera, a well-lit textured subject about a meter away, tap to focus. Consistent testing is the only way to know whether a step actually helped.
8. The safe-mode test: is a third-party app causing it?
Motorola’s support documentation specifically recommends safe mode when the camera misbehaves: safe mode boots the phone with only pre-installed system apps running. If the camera focuses normally in safe mode, a third-party app you installed is interfering.
How to enter safe mode on a Motorola phone
- Press and hold the power button until the power menu appears.
- Touch and hold “Power off” on the screen until a “Reboot to safe mode” prompt appears.
- Tap OK. The phone restarts with “Safe mode” shown in a corner of the screen.
- Open the Moto Camera app and test focus.
- To exit, simply restart the phone normally.
Interpreting the result
- Focus works in safe mode: a downloaded app is the culprit. Think about what you installed recently — third-party camera apps, “camera enhancer” utilities, QR scanners, social apps with camera features, and aggressive battery-saver or “phone booster” apps are the usual suspects. Uninstall them one at a time (most recent first), restarting normally after each removal, until focus works.
- Focus still fails in safe mode: the problem is in the system software, settings, or hardware — continue with sections 9 and 12.
Quick fact: So-called “RAM booster,” “phone cleaner,” and battery-saver apps are frequent causes of camera misbehavior on Android. They kill background camera processes or restrict hardware access to “save power,” which can leave the autofocus system starved of the resources it needs. If you have one installed, remove it before doing anything else.
9. Camera settings that affect focus
Sometimes the camera is working exactly as designed — a setting is just telling it to do the wrong thing. Review these in the Moto Camera app’s settings (gear icon).
| Setting | How it affects focus | Recommended check |
|---|---|---|
| Photo resolution / photo size | Motorola notes that a smaller photo size produces lower image quality that can look like a focus problem | Set resolution to the highest available and compare |
| Macro mode / auto macro-switch | On phones with a dedicated macro lens, a glitching auto-switch can trap the camera on the wrong lens for normal shots | Turn macro off and test normal-distance focus |
| Tracking / subject-tracking autofocus | Continuous tracking keeps the lens moving; if it never settles, shots look soft and the shutter lags | Turn tracking off for still subjects; tap to focus instead |
| Night Vision / night mode | Long exposures amplify handshake blur that mimics a focus failure | Brace the phone or use a steady surface; don’t judge focus by night shots alone |
| Zoom level | Digital zoom magnifies softness; Motorola notes pixelation is unavoidable when zooming | Test at 1x first — if 1x is sharp, the “problem” is zoom, not focus |
| Portrait / bokeh mode | Deliberately blurs the background; a mis-detected subject edge looks like missed focus | Test in standard Photo mode to isolate the issue |
| Pro / manual mode focus | Lets you set focus distance yourself — useful as a diagnostic | Try the manual focus slider: if the image sharpens at some slider position, the optics work and the issue is auto-focus logic |
The manual-focus diagnostic
If your Moto Camera app offers a Pro or Manual mode, open it and find the manual focus control (often labeled MF with a slider). Drag the slider slowly across its range while watching the viewfinder. If the image snaps sharp at any point, the lens and sensor are mechanically capable of focusing — the autofocus logic is what’s failing, which points to software, settings, or the laser/PDAF sensor rather than a dead focus motor. If nothing ever looks sharp at any slider position, that points toward the optics or sensor hardware.
Low light is not a defect
Every autofocus system degrades as light falls. Contrast detection hunts, PDAF gets noisy, and even laser AF has range limits. If your Motorola focuses fine in daylight but struggles in a dim restaurant, that is the physics of the system, not a fault. Use Night Vision (braced steady), add light, or tap-to-focus on the brightest part of your subject.
10. Symptom worksheet: match what you see to the likely cause
Use this table to narrow down your specific symptom before deciding on a fix. Start with the row that best matches what you’re experiencing.
| What you see | Likely cause | Try first |
|---|---|---|
| Everything is hazy, like shooting through fog | Dirty or smudged lens | Clean all rear lenses with a dry microfiber cloth (section 5) |
| Focus hunts in and out, never locks — worse in low light | Laser AF sensor blocked (Edge models) or low-contrast subject | Remove case/lens protector; test on a textured, well-lit subject |
| Tap-to-focus works, but auto focus doesn’t | Auto-focus logic or a conflicting setting | Check tracking AF, macro mode, and portrait mode settings (section 9) |
| Only close-up shots are blurry; normal distance is fine | Macro auto-switch glitch or fixed-focus limitation | Turn macro mode off; check whether your model has a real macro lens |
| Only one lens is blurry (e.g., ultrawide but not main) | That specific lens is dirty, or its actuator failed | Clean that lens; test each lens at 0.6x, 1x, and telephoto zoom |
| Clicking, rattling, or buzzing from the camera area | Stuck or failing focus/OIS motor (VCM) | Do not force it — this is hardware; see section 12 |
| Blurry only in one app (e.g., Snapchat) but fine in Moto Camera | Third-party app issue | Update or reinstall that app; test with safe mode (section 8) |
| Viewfinder wobbles or the image “swims” | Failing optical image stabilization | Hardware fault — professional assessment needed |
| Photos were fine, then went soft after an update | Camera app or system software regression | Update Moto Camera and system software; clear camera cache |
| Soft only at high zoom | Digital zoom magnification, not a focus fault | Test at 1x — if 1x is sharp, the camera is fine |
| Front camera soft, rear camera fine | Dirty selfie lens or fixed-focus distance mismatch | Clean the hole-punch lens; hold phone at normal arm’s length |
| Condensation or fog visible under the lens glass | Moisture inside the camera module | Power off; do not charge a wet phone; seek professional drying assessment |
11. What these checks can and cannot establish
Honest troubleshooting means knowing the limits of each test. A check that “passes” doesn’t always prove what you hope it proves.
| Check | What it can establish | What it cannot establish |
|---|---|---|
| Lens cleaning | Whether surface grime was the problem | Whether the lens coating is scratched underneath the grime |
| Removing the case | Whether the case or protector was blocking the sensor | Whether the sensor itself is faulty |
| Tap-to-focus works | The lens can physically move and the sensor captures sharp images | That auto-focus logic or the laser sensor is healthy |
| Manual focus slider sharpens image | Optics and sensor are fundamentally working | Which auto-focus subsystem (laser, PDAF, contrast) is failing |
| Safe mode fixes it | A third-party app is interfering | Which app, without further elimination |
| One lens sharp, another blurry | The problem is isolated to one camera module | Whether it’s dirt, actuator failure, or misalignment without inspection |
| Clicking sound from camera | Strong indicator of mechanical VCM/OIS failure | The exact failed component without opening the module |
Quick fact: No software test can definitively distinguish a scratched lens coating from a failing focus motor — both produce permanently soft images. If every software step passes and images stay soft, the next step is a hands-on hardware inspection, not more settings changes.
12. When it’s a hardware problem
If you’ve worked through sections 2 through 9 and focus still fails, the evidence points to hardware. Here’s how to recognize the specific failures.
Stuck or failed focus motor (VCM)
The autofocus motor — a voice-coil motor that physically slides the lens — is a tiny mechanical part, and mechanical parts can jam. The classic symptom is a faint clicking, rattling, or buzzing from the camera area when the camera app opens or tries to focus, sometimes accompanied by the viewfinder image vibrating. Some users report that a gentle tap on the phone temporarily frees a stuck motor. Treat that as a diagnostic clue, not a repair: a motor that sticks once will stick again, and striking the phone risks cracking the lens or damaging the stabilization system. A phone that needs percussive maintenance needs a camera module replacement.
Failed optical image stabilization
On models with OIS, a failing stabilizer produces a distinctive “swimming” or wobbling viewfinder — the image drifts or tilts on its own. Photos come out smeared even in good light with a steady hand. OIS failure is a module-level hardware fault.
Scratched or cracked lens glass
Inspect the lenses under a bright lamp. Fine circular scratches in the coating (often from wiping with a rough cloth or carrying the phone lens-down on grit) scatter light and permanently soften images — no software fix can correct them. A cracked outer glass element needs replacement; continued use risks letting dust and moisture reach the sensor.
Moisture inside the module
Fogging visible under the lens glass means moisture has breached the seals. Power the phone off, do not charge it, and don’t try to “dry it out” with heat or rice — both are ineffective and heat is dangerous near a battery. A repair shop can assess whether drying and resealing is possible or the module needs replacement.
Drop or bend damage
A hard drop can decenter a lens element, crack the actuator flex cable, or shift the whole camera assembly. If focus failed immediately after a drop or impact, say so when describing the problem — it changes the diagnosis completely.
Stop for safety: A swollen battery can push against the camera assembly and cause focus failure — and a swollen battery is a fire risk. If your phone’s back cover is lifting, the screen is separating, or the phone rocks on a flat table, stop using it, do not charge it, do not puncture or press on it, and take it for professional assessment immediately.
13. When to stop troubleshooting and get help
Stop and seek professional assessment when any of these are true:
- You hear clicking, rattling, or buzzing from the camera area.
- There’s visible moisture under the lens glass.
- The lens glass is cracked or deeply scratched.
- Focus failed right after a drop, bend, or liquid exposure.
- The phone shows any sign of battery swelling.
- Every software step in this guide passes, but images stay soft.
- The camera app crashes or shows “Camera busy” / “Please restart camera” errors that survive a restart and cache clear.
What to tell the repair shop
Bring useful information: your exact Motorola model, when the problem started, whether it followed a drop, update, or liquid exposure, which lenses are affected (main, ultrawide, telephoto, front), whether tap-to-focus works, and everything you already tried. That history saves diagnostic time.
Questions worth asking before approving a repair
- Is the issue the outer lens glass, the camera module, or something else — and how was that determined?
- Will the replacement part restore the original focus performance, including laser AF if my model has it?
- Does the repair affect the phone’s water resistance rating?
- What warranty covers the repair work itself?
If you’re in the Las Vegas area, Las Vegas Phone Repair & Accessories (7400 Las Vegas Blvd S, Unit TT42, Las Vegas, NV 89123; (424) 406-6202; open 10AM–8PM — call ahead to confirm today’s hours) can assess camera hardware issues and explain your options before any work is done.
14. Preventing focus problems on your Motorola
- Use a properly fitted case with a precise camera cutout designed for your exact model. Test focus with any new case on.
- Skip stick-on lens protectors unless they’re specifically designed for your model with cutouts for every sensor — many do more harm than good.
- Clean the lenses regularly with a dry microfiber cloth, especially after the phone has been in a pocket or bag.
- Don’t carry the phone lens-down on rough surfaces; grit is what scratches coatings.
- Keep the Moto Camera app and system software updated — focus behavior improves with driver updates.
- Avoid “phone booster” and aggressive battery-saver apps that interfere with camera hardware access.
- Use a strap or grip if you’re prone to drops — the focus motor is one of the most drop-sensitive components in the phone.
Owners of other brands with similar symptoms may find our brand-specific guides useful: OnePlus camera not focusing, Samsung camera not focusing, and iPhone camera not focusing cover the same diagnostic logic adapted to each manufacturer’s camera system.
15. Two hypothetical examples
(The following are hypothetical illustrations, not customer stories.)
Example 1 — Priya’s Edge with the new case. Priya buys a Motorola Edge and a stylish clear case from an online marketplace. Within days, her low-light photos turn into a hunting, pulsing mess — but daylight shots look fine. She cleans the lens twice with no change. On a hunch, she takes the case off: focus instantly returns. The case’s camera cutout covered the laser autofocus window beside the lenses. She replaces it with a model-specific case with a wider cutout, tests focus before keeping it, and the problem never returns. Total cost: one replacement case.
Example 2 — Marcus’s Moto G with the clicking camera. Marcus drops his Moto G Stylus on a tile floor. The screen survives, but from then on the rear camera makes a faint clicking sound when it opens and no photo ever looks sharp — not at any distance, not with tap-to-focus, not in safe mode. The manual focus slider in Pro mode never finds a sharp point either. Every software check passes, which tells him the failure is mechanical: the drop jammed or broke the focus motor. He stops troubleshooting, backs up his photos, and takes the phone in for a camera module assessment instead of buying a new phone outright.
16. Frequently asked questions
Why is my Motorola camera blurry all of a sudden?
A sudden change usually means something changed: a new case or lens protector, a recent drop, a software update, or a newly installed app. Work backward from what changed. If nothing changed, start with the 5-minute sequence in section 2 — a smudged lens from handling the phone is the most common “sudden” cause.
Does clearing the camera cache delete my photos?
No. Clearing the Camera app’s cache removes temporary operational files only. Even the stronger “Clear storage” option resets the app’s settings without touching your photos, which live in the Gallery or Google Photos app. Motorola’s own support documentation confirms this distinction.
Why does my Motorola camera click but not focus?
A clicking or rattling sound from the camera area when focusing usually means the voice-coil focus motor or the optical image stabilization mechanism is mechanically stuck or failing. This is a hardware fault. A gentle tap sometimes frees a stuck motor temporarily, but the permanent fix is replacing the camera module — and you should not strike the phone as a remedy.
Can a phone case really stop the camera from focusing?
Yes — particularly on Motorola Edge models with laser autofocus. The laser distance sensor sits in a small window beside the lenses, and a case with a misaligned cutout or a stick-on lens protector covering that window breaks distance measurement. The camera then hunts for focus endlessly, especially in low light. Removing the case is the definitive test.
Why won’t my Motorola focus on close-up objects?
Three possibilities: your model may use a fixed-focus system with no close-up capability (check the specs, especially on entry-level models); the macro auto-switch may be glitching and trapping the camera on the wrong lens (turn macro off and test); or you’re simply closer than the lens’s minimum focus distance — back up a few centimeters and tap to focus.
Should I use a third-party camera app instead of Moto Camera?
A third-party camera app is a reasonable diagnostic step: if another app focuses fine, the Moto Camera app’s data or settings are the problem (clear its storage). But as a permanent replacement, weigh the trade-offs — third-party apps may not support Motorola-specific features like the laser AF tuning or Moto’s Night Vision processing. Fix the stock app first.
My camera worked before the update. What happened?
System and camera-app updates occasionally introduce focus regressions through changed drivers or reset settings. Install any follow-up updates (fixes often ship quickly), clear the camera app’s cache, and check that the update didn’t reset settings like resolution or re-enable tracking autofocus. If the problem clearly started with a specific update and nothing helps, report it through the Motorola support channels and watch for a patch.
Is it worth repairing, or should I replace the phone?
It depends on the diagnosis and the phone’s value. An outer lens-glass replacement is typically inexpensive relative to the phone. A full camera module replacement costs more but is still usually far less than a new device — especially for Edge and Razr models. Get a diagnosis first (including whether water resistance is affected), compare the repair quote against the phone’s current worth and remaining software-support life, and decide from there. Never approve work without a clear statement of which part is being replaced and what warranty covers the repair.
Video: How to tell if your smartphone is fake or real

Sources and editorial notes
- Motorola Support — Camera errors and troubleshooting (moto edge 40): official guidance to wipe the lens with a soft, dry cloth; restart the phone; clear the Camera app’s cache and storage; and update the camera app via the Play Store.
- Motorola Support (US) — Troubleshooting camera errors: documents the blurry-photo checklist, “Camera Busy” permission steps, and the safe-mode test for third-party app interference.
- PhoneRepair.co.uk — Motorola Edge+ (2024) camera not focusing guide: independent repair guide describing the laser autofocus sensor placement, case-interference focus hunting, VCM clicking symptoms, and macro auto-switch behavior on Edge models.
- PhoneArena — fixing blurry smartphone camera focus problems: explains the stuck voice-coil motor phenomenon and the manual-focus slider diagnostic.
- MakeUseOf — tracking autofocus and blurry photos: discusses how continuous tracking autofocus can cause blur and shutter delay on still subjects.
Last source check: October 14, 2026. AI-assisted editorial guide, checked against the linked manufacturer information. Motorola’s official troubleshooting steps are summarized in original language above; diagnostic interpretations, tables, and hypothetical examples are editorial content. Camera behavior varies by model and software version — menu paths reflect Motorola’s near-stock Android layout and may differ slightly on older devices. For hardware faults, professional assessment is recommended; never open the phone yourself.
Let’s get you connected again.
Tell us what’s happening with your device and we’ll help you decide the safest next step — no jargon, no pressure.
Las Vegas Phone Repair & Accessories · 7400 Las Vegas Blvd S, Unit TT42, Las Vegas, NV 89123
10:00 AM–8:00 PM — call ahead to confirm today’s hours