
Phone Camera Lens Scratched: Assessment and Safe Steps
A scratched phone camera lens is an assessment problem, not a cleaning problem: first confirm whether the mark is on the surface or in the glass, then test whether it actually changes your photos. Most light surface marks do not affect everyday photos, while deeper scratches that scatter light need professional assessment — and no cleaning method can repair real glass damage.
On this page
A scratched phone camera lens is an assessment problem, not a cleaning problem: first confirm whether the mark is on the surface or in the glass, then test whether it actually changes your photos.
1. Who this guide is for
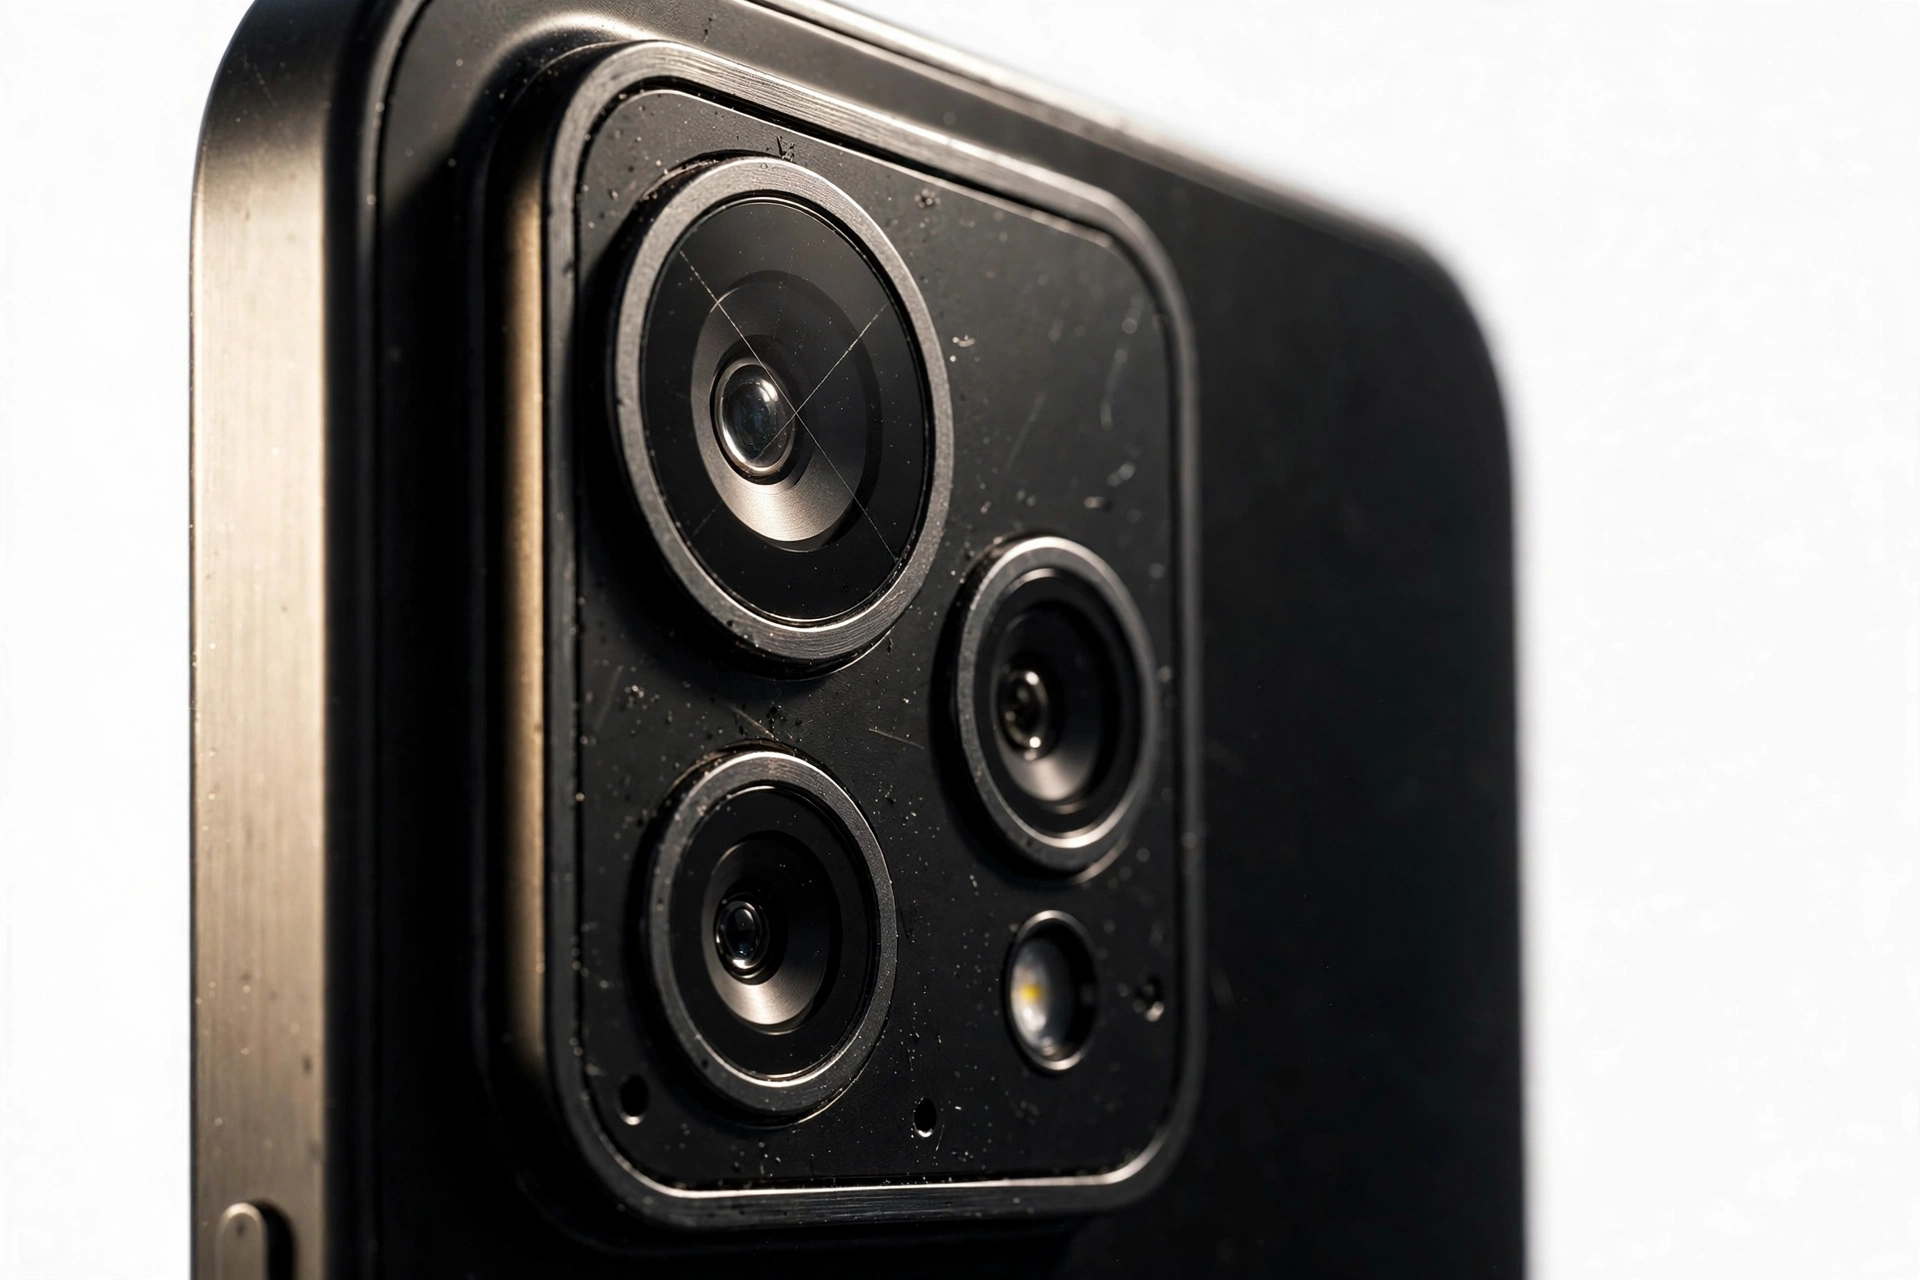
This guide is for anyone who has noticed a scratch, scuff, or abrasion mark on their phone’s camera lens — on an iPhone, Samsung Galaxy, Google Pixel, or any other phone — and wants to know whether it matters, what can be done safely, and when to seek professional assessment. It is for people who take photos with their phone regularly and want to make a clear-headed decision instead of panicking or trying risky fixes. (Source: support.apple.com)
This guide is not for a camera lens that is cracked, shattered, or has missing glass. A crack is structural damage with different consequences and a different decision path. If your lens is cracked rather than scratched, read the dedicated guide on a cracked camera lens assessment instead — the two problems overlap in symptoms but not in what you should do next.
It is also not a repair manual. Nothing here describes how to open a phone, replace a lens cover, or disassemble a camera module. Those are technician procedures. What you will find here is a careful assessment framework: how to look at the damage, how to test what it does to your photos, what safe cleaning looks like, what must never be attempted, and how to prepare for an assessment if one is needed.
2. Scratched vs cracked: why the distinction matters
People often use “scratched” and “cracked” loosely, but the difference decides everything that follows. A scratch is a surface mark — a line, scuff, or abrasion on the outer glass covering the lens. A crack is a fracture — glass that has split, chipped, or broken through.
The distinction matters because scratches and cracks behave differently. A light scratch on the outer lens cover may have no visible effect on photos at all, especially in normal lighting. A crack, by contrast, refracts and reflects light unpredictably, almost always degrades image quality, and can let dust and moisture reach the camera module behind the glass. The cracked lens guide covers that path in detail.
Sometimes the two overlap: a scratch can become a crack if the phone is dropped again, and a “scratch” you feel with a fingernail may actually be the beginning of a fracture. The assessment steps below are designed to help you tell which one you are dealing with.
3. What the manufacturers say about camera lens care
Both Apple and Samsung publish guidance on how to clean and inspect camera lenses. Their advice is conservative — and for good reason. Camera lens glass is a precision optical surface, and aggressive cleaning does more harm than good.
Apple’s guidance
Apple’s camera troubleshooting guidance instructs users to clean all camera lenses with a soft, slightly damp, lint-free cloth — for example, a lens cloth. Before cleaning, Apple says to unplug all cables and turn the iPhone off first. Apple’s important cautions: do not use products containing bleach or hydrogen peroxide, avoid getting moisture in any openings, do not submerge the iPhone in any cleaning agents, and do not use compressed air.
Apple also advises removing any case, accessory, or film that may block the camera or flash, noting that magnetic accessories can interfere with iPhone cameras. And Apple directs users to inspect the iPhone for damage around the camera — damage from a drop may require camera repair. Notably, Apple’s symptom list for camera problems includes “abnormal flare, haze, or spot near the edge” and “brightly colored scratches” — both of which are consistent with what a scratched lens can produce in photos.
Samsung’s guidance
Samsung’s camera troubleshooting guidance recommends cleaning the camera lens to remove fingerprints, dust, or smudges, and notes that light streaks or glare (lens flare) may be more noticeable if the lens is dirty or when using high zoom. Samsung’s camera focus guidance says to clean the lens with a soft, dry, lint-free cloth, and to make sure the phone cover and accessories do not cover the edges of the camera lens, which can prevent the camera from focusing.
What both agree on
The manufacturers converge on a simple position: use a soft, dry or slightly damp lint-free cloth; nothing abrasive; nothing with harsh chemistry; and if the problem persists after cleaning and basic checks, the next step is professional assessment — not more aggressive cleaning. That position is the backbone of this guide.
4. How a scratched lens changes your photos
Before deciding anything, it helps to understand what a scratch actually does to an image. A camera lens is designed to pass light cleanly to the sensor behind it. A scratch on the lens surface disrupts that light path in specific, predictable ways.
What you may see
- Lens flare and light streaks: bright light sources (the sun, streetlights, lamps) produce streaks, halos, or starburst patterns that were not there before. This is the most common visible effect of a scratch.
- Haze or reduced contrast: photos look slightly washed out, especially in bright conditions. Fine scratches scatter light across the whole frame rather than in one spot.
- Soft spots: one area of the photo is less sharp than the rest, as though a small patch is out of focus. This happens when a scratch sits over part of the lens area used for that region of the image.
- Brightly colored artifacts: thin, rainbow-like or brightly colored lines near bright areas of the image. Apple’s own troubleshooting list mentions “brightly colored scratches” as a known camera symptom.
- Nothing at all: many light scratches are only visible under the right angle of light on the glass itself and have no visible effect on photos. This is a normal and common outcome — and it is important not to “fix” a cosmetic mark that is not harming anything.
Why lighting conditions matter
A scratch’s effect depends heavily on lighting. In bright, direct light — shooting toward the sun, night scenes with streetlights — a scratch will show its effects most clearly. In soft, even lighting, the same scratch may be invisible in the final image. This is why testing under several lighting conditions (section 5) is more informative than any amount of staring at the glass.
Quick facts: The most reliable test of a scratched lens is not looking at the glass — it is comparing photos. Take the same photo before and after cleaning, and in different lighting, to see whether the mark actually affects your pictures.
5. Assess the scratch: the three-minute check
Work through these steps in order. Each one takes a minute or less, and together they answer the two questions that matter: is this a scratch or something worse, and does it affect my photos?
Step 1: Look at the glass under angled light
Hold the phone so light strikes the camera lens area at an angle — tilt it under a lamp or near a window. Scratches show up as fine lines that catch the light. Note which lens has the mark if your phone has more than one camera: the wide, ultrawide, and telephoto lenses each have their own glass.
Step 2: The fingernail test
Gently run the edge of a fingernail across the mark — with light pressure, never pressing hard. If your nail catches in the mark, it is a genuine scratch in the glass surface. If your nail glides over it smoothly, the mark may be a surface smudge, residue, or a scratch in a protector film rather than the glass itself.
Step 3: Check whether it is the protector, not the glass
If you have a camera lens protector — the adhesive film or glass ring many people apply — the scratch may be in the protector rather than the lens underneath. Look at the edges: can you see a separate layer? If so, removing the protector (peel it off gently; do not use tools) and re-checking may show the lens glass underneath is undamaged.
Step 4: Take test photos in three conditions
With the lens cleaned (see section 7 for how), take the same simple photo three times: in bright light toward a light source, in soft indoor light, and in low light. Review each at full size. Look specifically for streaks, haze, soft spots, and colored artifacts. Compare with a photo taken before the scratch appeared, if you have one.
Step 5: Check each lens separately
On multi-camera phones, the scratch affects only the lens it is on — but you may not know which lens is in play at any moment. Test each camera mode individually: wide (1x), ultrawide (0.5x), and telephoto (2x/3x/5x). A scratch on the ultrawide lens will not affect telephoto shots, and vice versa.
6. Assessment table: scratch type → likely impact → action
| What you see | Likely impact on photos | Recommended action |
|---|---|---|
| Fine hairline mark, visible only at an angle | Usually none in normal photos | Clean gently and re-test; monitor, no action needed if photos are unaffected |
| Mark only in a lens protector film | None once protector is replaced | Remove and replace the protector; inspect the glass underneath |
| Visible scuff that catches a fingernail | Possible flare or softness in bright light | Clean, test in three lighting conditions; assess whether the effect is acceptable |
| Scratch producing light streaks in night photos | Noticeable in backlit and night scenes | Document the effect; seek assessment if the streaks bother you |
| Haze or low contrast across many photos | Moderate, especially in bright conditions | Clean carefully first to rule out residue; if haze persists, seek assessment |
| Deep groove visible straight-on | Likely significant flare and soft spots | Seek assessment; do not attempt any repair method yourself |
| Mark that looks like it may be a fracture, not a scratch | Unpredictable refraction, possible dust entry | Treat as potential crack — see the cracked lens assessment guide; seek assessment promptly |
| Scratch plus moisture or fogging inside the lens | Serious; indicates the seal is compromised | Seek assessment promptly; keep the phone dry and do not attempt to open it |
Stop for safety: If the mark is a crack rather than a scratch — if the glass is split, chipped, has sharp edges, or has missing pieces — stop assessing and treat it as damage requiring professional assessment. Cracked lens glass can shift, let in dust and moisture, and in rare cases shed small glass fragments. Handle the phone gently and keep it away from further impacts.
7. Safe cleaning: what to use and what to avoid
Cleaning is the one action you can always take safely — provided it is done the way the manufacturers describe. The purpose of cleaning is to remove residue (fingerprints, dust, oils) so you can tell whether the mark is a genuine scratch or just dirt. Cleaning cannot repair a scratch, and cleaning harder will not make one disappear.
What to use
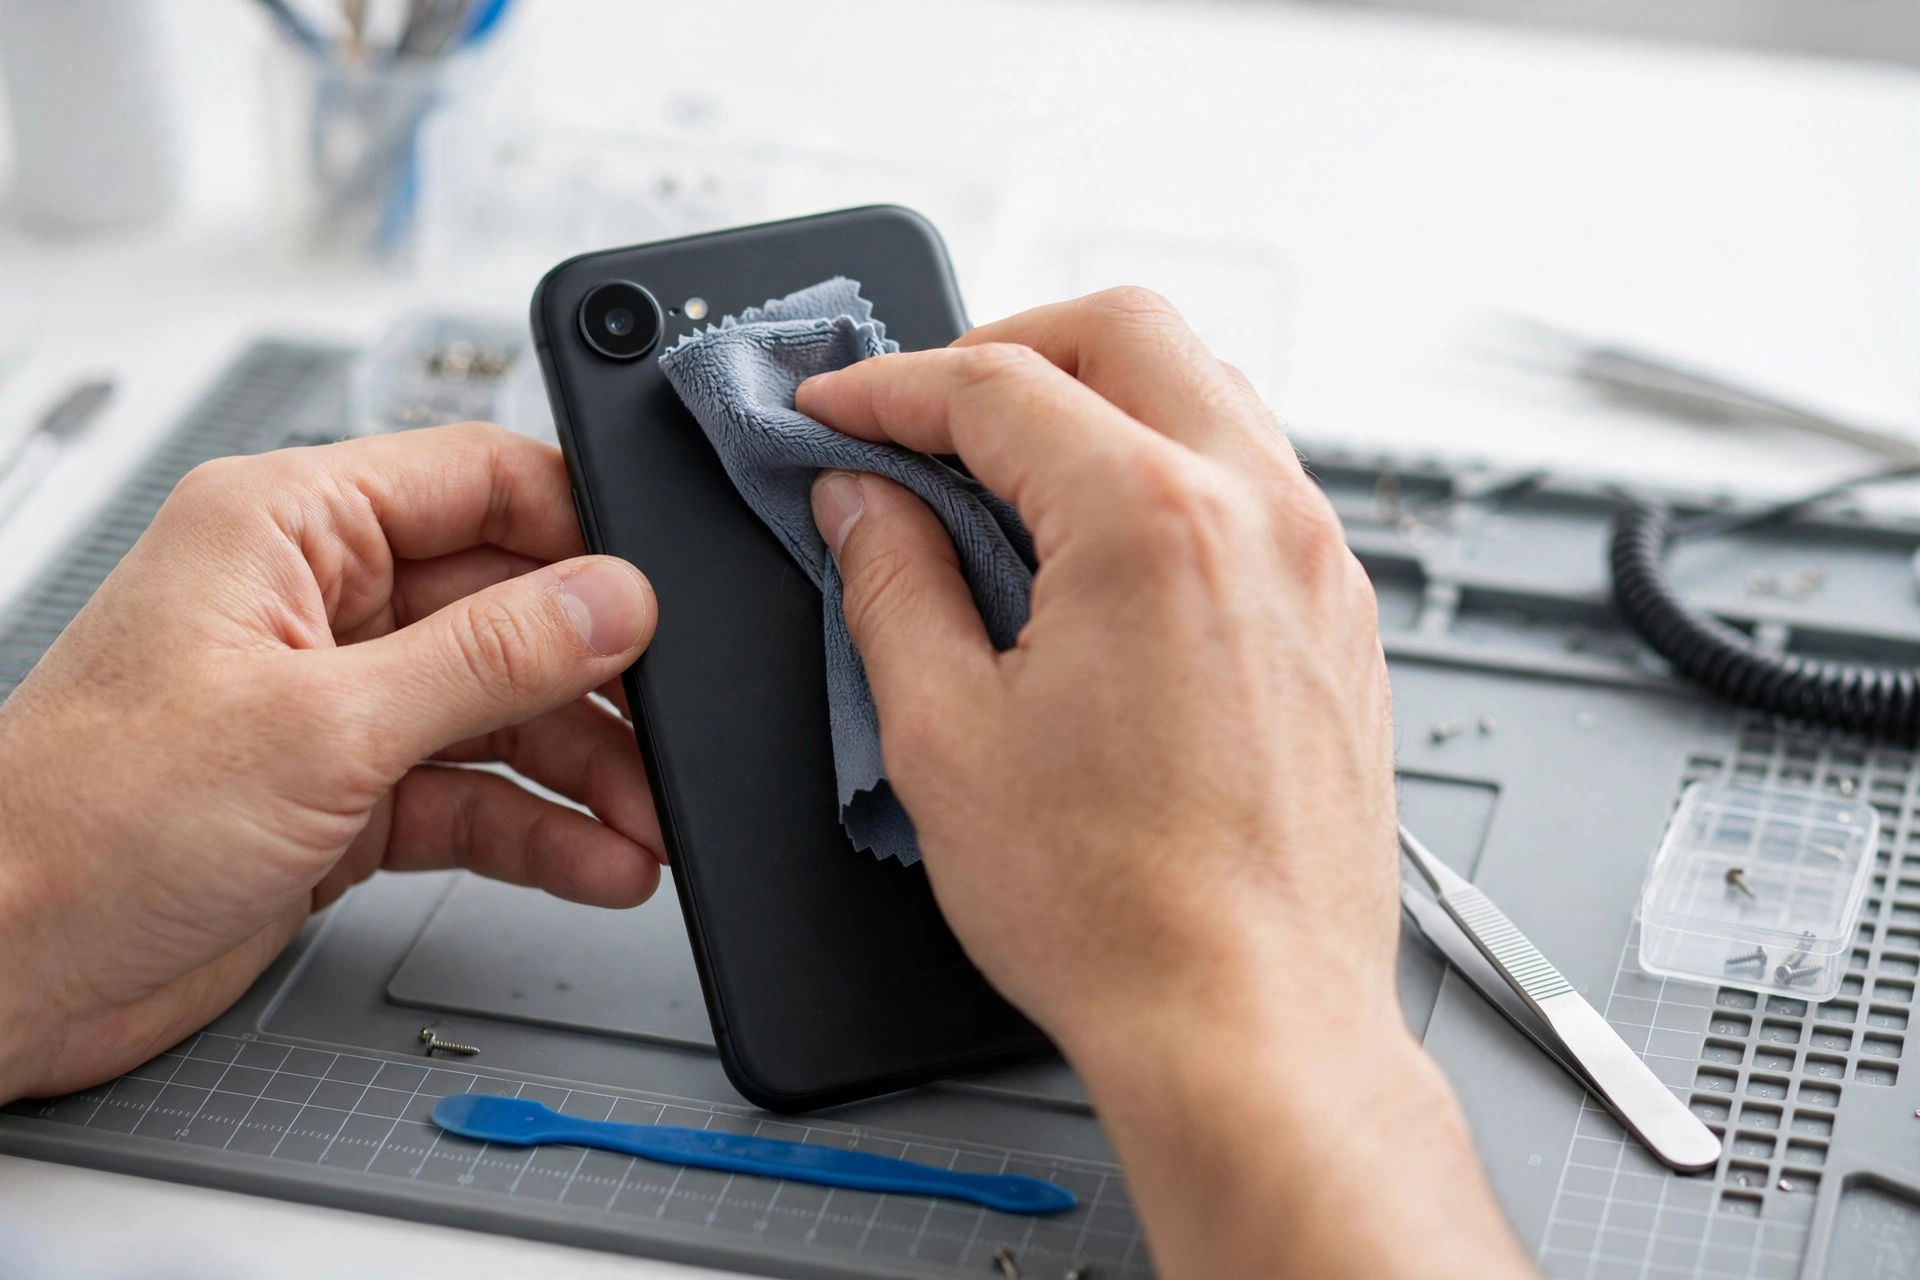
- A soft, dry, lint-free cloth — a microfiber or dedicated lens cloth is ideal. This is what both Apple and Samsung recommend.
- A slightly damp cloth — for stubborn residue, Apple permits a soft, slightly damp, lint-free cloth. Damp means barely moist, never wet, and never with liquid pooling around the camera area.
- Light circular motions — wipe gently in small circles with minimal pressure. The goal is to lift residue, not to polish the glass.
What to avoid
- Paper products — tissues, paper towels, and napkins can contain wood fibers that scratch lens coatings. Do not use them on camera lenses.
- Your shirt or rough fabrics — convenient but often abrasive, especially if there is grit on the fabric.
- Household cleaners — anything containing bleach, hydrogen peroxide, ammonia, or strong solvents. Apple explicitly warns against bleach and hydrogen peroxide.
- Compressed air — Apple explicitly warns against using compressed air near the iPhone, which can force moisture and debris into openings.
- Excessive moisture — never submerge the phone in any cleaning agent, and avoid getting moisture into any openings.
Before cleaning, power the phone off and unplug all cables, following Apple’s guidance. After cleaning, let the lens area dry fully and then repeat your test photos — many “scratches” turn out to have been stubborn residue all along.
8. What never to do: abrasives and “repair” methods
This section is deliberately blunt. The internet is full of home remedies for scratched glass, and almost all of them are wrong for a phone camera lens.
Stop for safety: Never use abrasive polish, toothpaste, baking soda, cerium oxide compounds, or any “scratch remover” kit on a phone camera lens. These products work by removing material — they grind away at the surface. On a precision lens, that means destroying the optical coating and potentially making the damage worse. There is no home method that restores a scratched camera lens to its original optical quality.
- No toothpaste, no baking soda paste: these are abrasives. They will dull the lens coating and can make haze worse.
- No “miracle” scratch-remover liquids: these either do nothing or fill the scratch with a substance that degrades image quality in its own way.
- No sandpaper or polishing pads, no matter how fine: camera lens glass is a coated optical surface, not a window pane.
- No attempts to buff, grind, or resurface the glass: any material removal changes the optical properties of the lens.
- No opening the phone to reach the lens from inside. This risks the camera module, the water-resistance seal, and your safety.
The honest truth: a genuinely scratched lens cover cannot be restored by cleaning or polishing. The legitimate remedies are replacing the protector (if the scratch is in it), living with it (if it does not affect photos), or professional assessment and lens-cover replacement (if it does).
9. Rule out the easy stuff first
Before concluding you have a scratched lens, eliminate the impostors. Several common problems look like lens scratches but are not.
Checklist
- Is it a protector? A scratched lens protector is a one-minute fix — replace it. Always check for a protector layer before assuming the glass is damaged.
- Is it a case reflection? Some cases with glossy rims around the camera cutout create internal reflections that look like flare from a scratch. Remove the case and test again.
- Is it residue? Dried sunscreen, cosmetics, food oils, and adhesive residue can look like scratches under angled light. A proper cleaning (section 7) is the test.
- Is it the software? Blurriness, spots, and haze can come from software — focus errors, a dirty sensor interpretation, or a failing camera app. Try the standard camera troubleshooting: restart the phone, update the software, reset camera settings. If the camera will not open at all or the camera shakes, those are separate problems with their own causes.
- Is it just the light? Every phone camera produces some flare when pointed at bright light sources. Take a reference photo with a different phone, or of the same scene before the scratch appeared, to establish what is normal for your device.
10. Hypothetical examples
(The following are hypothetical illustrations, not customer stories.)
Example 1: The beach-day scuff
A person returns from a beach day and notices a fine line across the main camera lens under bright light. Test photos look normal in daylight but show a slight streak when shooting toward the sunset. Cleaning reveals the mark catches a fingernail — a genuine light scratch. The effect is minor and only visible in backlit shots. They decide to live with it, apply a lens protector to prevent further marks, and check periodically whether the effect worsens.
Example 2: The “scratch” that was a protector
A person drops their phone on a gravel path and finds what looks like a deep scratch across the camera glass. Angled-light inspection shows a visible edge around the mark — it is in the adhesive protector, not the glass. Peeling the protector off reveals undamaged glass underneath, and test photos are clean. A replacement protector costs little and the problem is fully resolved.
Example 3: The growing mark
A person notices a scratch that seems to get longer over weeks, with haze appearing in more photos. On closer inspection under angled light, the “scratch” has a branched pattern at one end — it is a fracture, not a scratch. They stop using polishing ideas they found online, handle the phone gently, and seek professional assessment, where the lens cover is identified as needing replacement.
11. What these observations can and cannot establish
| Observation | What it establishes | What it does not establish |
|---|---|---|
| Scratch visible under angled light | There is a mark on the surface | Whether it affects photos — only test shots establish that |
| Mark catches a fingernail | It is a genuine surface scratch, not residue | How deep it goes or whether the coating is damaged |
| Test photos look normal | The scratch is not harming image quality in those conditions | That it will never matter — re-test in bright and night lighting |
| Flare in backlit photos | The scratch is scattering light in those conditions | That cleaning or polishing can fix it — they cannot |
| Mark disappears after cleaning | It was residue, not a scratch | That the lens is perfect — inspect under angled light to confirm |
The honest position: your assessment tells you whether the scratch matters to your photos and whether it is getting worse. It does not tell you the depth of the damage, the state of the coating, or whether replacement is needed. Those are technician determinations.
12. When to stop and seek assessment
Seek professional assessment when any of the following are true:
- The scratch clearly degrades your photos in normal use — persistent streaks, haze, or soft spots you cannot work around.
- The mark is deep enough to be seen straight-on, not just at an angle.
- The mark may be a fracture rather than a scratch — branched patterns, chipping, or sharp edges.
- There is fogging or moisture visible inside the lens area, which suggests the seal is compromised.
- The scratch is getting worse over time, which can indicate a spreading fracture.
- You have removed a protector and the glass underneath is damaged.
- You are unsure whether it is a scratch or a crack — when in doubt, treat it as damage and have it looked at.
Assessment does not commit you to a repair. It tells you what the damage is, what the options are, and what they cost — so you can decide with facts instead of guesses. Bring the phone with the photos you took during testing; showing a technician the actual effect on images is more useful than describing it.
13. Questions to ask before approving service
- Is the damage to the outer lens cover or to the camera module itself?
- What exactly will be replaced — just the lens cover glass, or the camera module?
- Will the water resistance of the phone be affected by opening it, and will it be resealed?
- What parts will be used, and what is the warranty on the work?
- What is the total cost, and are there any diagnostic fees separate from the repair?
- How long will the repair take, and will my data be preserved?
- Is there a risk that the camera module needs replacement rather than just the cover?
14. Preventing future scratches
- Use a case with a raised camera lip — the simplest protection. A case whose back sits above the camera glass keeps the lenses off surfaces.
- Consider a lens protector — a sacrificial film or glass ring over the camera area. If it scratches, you replace the protector, not the lens.
- Be careful where the phone rests — setting the phone camera-side down on concrete, gravel, sand, or rough stone is the most common cause of lens scratches. Sand is especially hazardous.
- Keep it out of the same pocket as keys and coins — metal objects are harder than lens coatings and will scratch them.
- Clean with the right cloth — always a soft, lint-free microfiber cloth, never clothing, paper, or rough fabric.
- Handle drops carefully — after any drop, inspect the camera area under angled light before assuming everything is fine.
15. Frequently asked questions
Can a scratched camera lens be fixed?
A scratch in the lens glass cannot be repaired by cleaning, polishing, or any home method. The legitimate options are: replace the protector (if the scratch is in it), live with it (if photos are unaffected), or have the lens cover replaced by a technician (if it degrades your photos).
Will a scratched lens affect all my photos?
No. Light scratches often have no visible effect in normal lighting. Effects appear mainly in bright, backlit, or night conditions where light sources cause flare and streaks. Test in several lighting conditions to see whether yours matters.
Should I try toothpaste or a scratch-remover kit?
No. These are abrasives that remove material from the surface. On a coated camera lens, they damage the optical coating and make image quality worse. There is no home remedy that restores a scratched lens.
How is a scratch different from a crack?
A scratch is a surface mark; a crack is a fracture through the glass. Cracks refract light unpredictably, almost always degrade photos, and can let in dust and moisture. If you are unsure which you have, treat it as potential damage and seek assessment — the cracked lens guide covers that path.
My photos are blurry — is it the scratch?
Not necessarily. Blurriness can come from focus errors, software issues, a dirty lens, or a case blocking the camera. Clean the lens properly, remove the case, restart the phone, and test again before blaming the scratch. If the camera shakes or will not open, see the guides on camera shaking and camera not opening.
Can I just replace the lens protector myself?
Yes — removing and replacing an adhesive lens protector is a user-level task and is the correct fix when the scratch is in the protector rather than the glass. Peel it off gently without tools, clean the glass underneath, and apply a new protector. Do not attempt to replace the lens glass itself.
Does a scratched lens void my warranty?
Cosmetic scratches are generally considered accidental damage rather than manufacturing defects, so they are typically not covered by a standard manufacturer warranty. Ask about your specific coverage before assuming.
When should I stop assessing and get help?
When the scratch clearly degrades your photos, when it may be a fracture rather than a scratch, when there is moisture inside the lens, or when you are unsure. Assessment is information, not commitment — it tells you what the damage is and what the options cost.
Video: How to tell if your smartphone is fake or real
Sources and editorial notes
- Apple Support — iPhone Troubleshooting Camera Issues: Apple’s official guidance on cleaning camera lenses (soft, slightly damp, lint-free cloth; no bleach, hydrogen peroxide, compressed air, or submersion), removing blocking cases and accessories, inspecting for damage, and the listed symptoms including abnormal flare, haze, and brightly colored scratches. (Last checked October 13, 2026.)
- Samsung Support — Fix Samsung Galaxy blurry / poor photo and video quality: Samsung’s official guidance on cleaning the camera lens to remove fingerprints, dust, and smudges, and the note that light streaks or glare may be more noticeable if the lens is dirty or when using high zoom. (Last checked October 13, 2026.)
- Samsung Support — What to do if my Galaxy phone camera does not focus: Samsung’s guidance to clean the lens with a soft, dry, lint-free cloth and to ensure covers and accessories do not block the lens edges. (Last checked October 13, 2026.)
- All Things How — Safely clean your iPhone camera lens: third-party guide corroborating Apple’s lens-cleaning procedure and the iOS 26 Lens Cleaning Hint feature. (Last checked October 13, 2026.)
Last source check: October 13, 2026. AI-assisted editorial guide, checked against the linked manufacturer information. Procedures described here follow Apple and Samsung published support guidance; third-party sources are cited only for corroboration. This guide covers assessment, not repair — nothing here describes opening the phone or replacing lens components. If your phone needs hands-on assessment, Las Vegas Phone Repair & Accessories is at 7400 Las Vegas Blvd S, Unit TT42, Las Vegas, NV 89123 — call (424) 406-6202 ahead to confirm today’s hours (generally 10:00 AM–8:00 PM).
Let’s get you connected again.
Tell us what’s happening with your device and we’ll help you decide the safest next step — no jargon, no pressure.
Las Vegas Phone Repair & Accessories · 7400 Las Vegas Blvd S, Unit TT42, Las Vegas, NV 89123
10:00 AM–8:00 PM — call ahead to confirm today’s hours